There's a moment every aspiring creator knows well — you've just filmed what feels like your best work yet, the lighting was decent, the ideas were solid, and the energy was right. Then you sit down to edit, and suddenly the footage feels like a scattered puzzle with no picture on the box. That's the exact moment where video editing stops being a technical afterthought and becomes the craft that separates a forgettable upload from a video people actually watch all the way through. Video editing is a powerful skill that can transform raw footage into compelling content. I've been there, overwhelmed at the timeline with no idea where to start — and this guide is what I wish someone had handed me at the beginning.
Videos are the ultimate form of entertainment in the modern era. People share reels and stories on social media, and some are even earning money by making YouTube videos. It wouldn't be wrong to say that people are spending more time watching videos than reading articles. Given that landscape, learning to edit well isn't a luxury — it's one of the most valuable creative skills you can develop. At its core, making videos is all about storytelling. Good editing transforms raw footage into a compelling narrative, guiding the viewer through the story in a cohesive and engaging manner. Whether you're a beginner looking to publish your first YouTube video or an intermediate creator trying to level up your craft, this guide is built for you. By the time you finish reading, you'll understand how to go from a chaotic rough cut to a polished, platform-ready final product.
*
Getting Started: The Foundational Steps
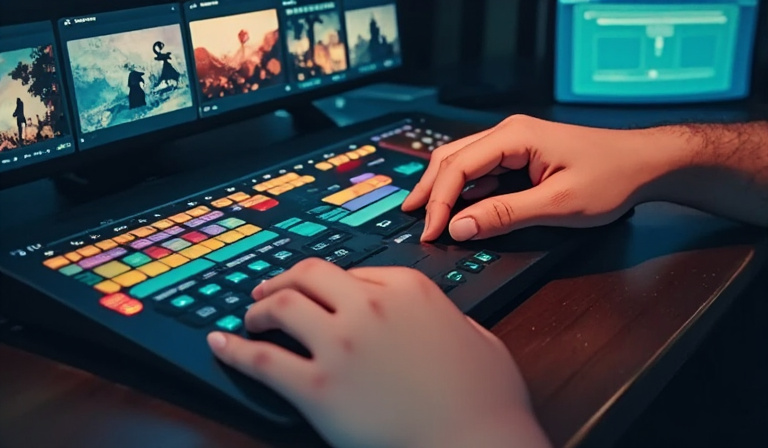
Choosing Your Software
Before you place a single clip on a timeline, you need to choose your editing environment. The first step is considering your editing needs, skill level, and budget. Review the user interface, how it works, and how it complements the content you want to make. The good news is that you genuinely don't need to spend a dime to get started. DaVinci Resolve stands out as the most powerful free video editor, while CapCut works great as a free, easy-to-use option with added depth — and iMovie remains the best free simple editor for Mac users. On the paid side, programs like Adobe Premiere Pro and Final Cut Pro offer more flexibility and editing options, like color grading and advanced audio tools.
My personal recommendation? Start with software that has a free version available so you can test different options and find the right video editing tool for you. DaVinci Resolve is particularly worth noting — it combines a sophisticated color correction tool with professional multi-track editing features, works well as a video editing tool for beginners, and offers personalized filters, text overlays, and animated scene changes in its free version. If you're editing primarily for mobile platforms like TikTok or Instagram Reels, CapCut is a genuinely excellent mobile-first option that handles everything from trimming to captions with surprising ease.
Organizing Your Assets
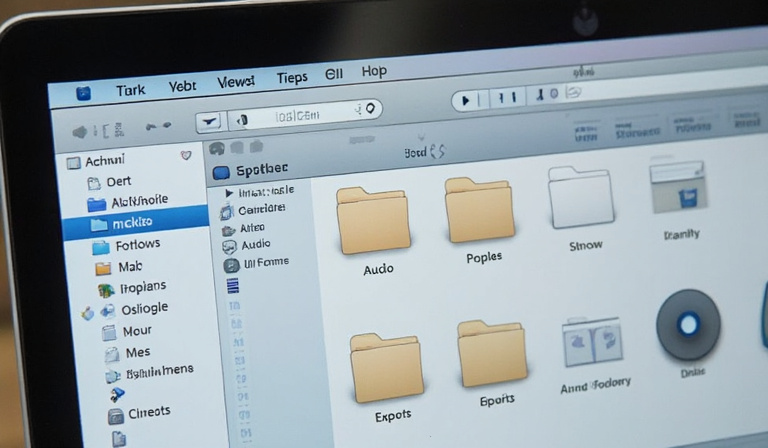
Once you've picked your software, the next thing most beginners want to skip — but absolutely shouldn't — is organization. If you don't organize everything into separate folders, it can quickly become a confusing mess once you sit down to edit. The last thing you want to do is get into the flow of editing only to need to jump out and find the right hex code for your logo. It disrupts your creative flow and wastes time, so organizing your footage and other assets is the first step to a successful editing workflow.
There's a common file folder organization process that professional video editors use — have a folder with a specific name for the project, and then several subfolders for all of the various project assets, like footage, music, sound effects, overlays, and images. I follow the same structure personally: one master folder named after the project, with subfolders labeled Footage*, *Audio*, *Graphics*, and *Exports. To keep your naming conventions consistent, number clips in recording order — for example, 01\_intro, 02\_demo, 03\_conclusion — and tag audio files by type, such as voiceover, music, or effects. And don't skip backups. Keep three copies of everything you create, in at least two locations, with one of those places being physically separate from the other.
*
The Core Editing Techniques: Making Your Footage Flow
Building the Rough Cut
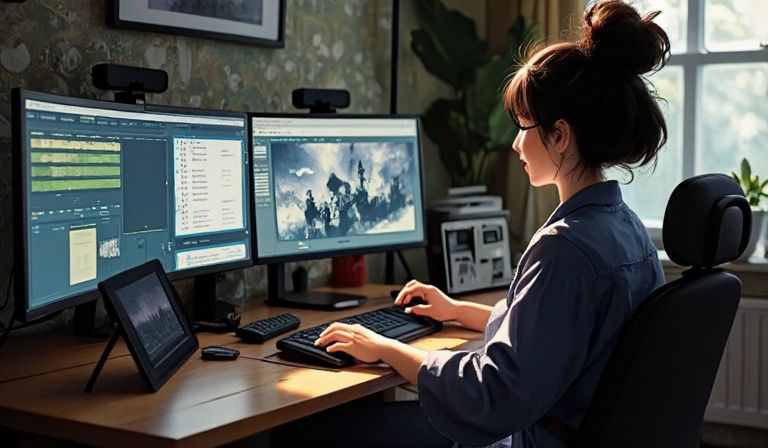
Now comes the part that feels simultaneously exciting and paralyzing: actually editing. The first phase is always the rough cut, and the key here is to resist perfectionism. The first stage of the edit is to build the initial structure of the video. This usually involves making sure the right people are saying the right things in the right order. At this point, the main goal is to get the story structure working, without worrying about all the rough edges.
It involves choosing the right clips, arranging them in an effective sequence, and determining the perfect timing for each scene. This process helps ensure the story unfolds logically and emotionally resonates with the audience. Think of the rough cut as your first draft — it doesn't need to be pretty, it just needs to exist. Drag your best takes onto the timeline, eliminate the obvious mistakes, and sketch out the backbone of your narrative before anything else.
Pacing, Rhythm, and Transitions
Once the rough structure is in place, pacing becomes your primary tool. Adjust the pacing to match the energy and tone of the story. Use quicker cuts for high-energy moments and longer takes for contemplative scenes. This is the difference between a video that feels alive and one that puts people to sleep. Background music influences mood and keeps the video energetic — match the tempo of your cuts with the rhythm of the soundtrack.
When it comes to transitions, restraint is your best friend. Many beginners fall in love with wipes, spins, and glitch effects — and use them constantly. The result almost always looks amateurish. A clean, well-timed cut is almost always more powerful than a flashy transition. Reserve dissolves and stylistic transitions for intentional storytelling moments, like the passage of time or a mood shift. Jump cuts are one of the most widely used editing techniques for YouTube videos. They help eliminate awkward pauses and keep the content flowing at a fast pace. By cutting directly from one part of the clip to another, you keep your viewers' attention without losing them to slow or irrelevant parts of the video.
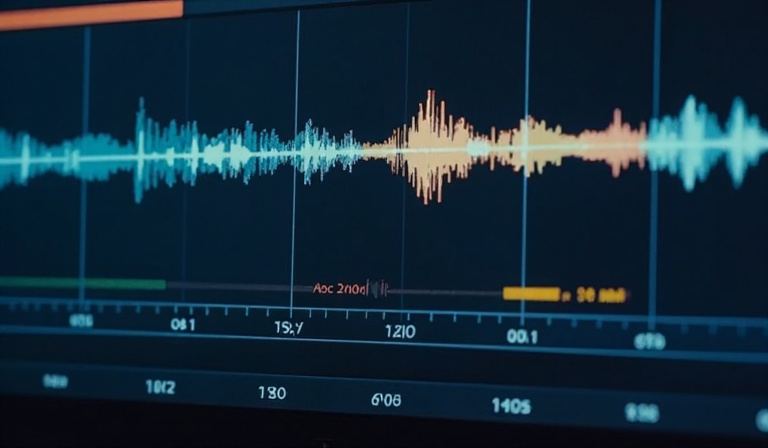
Audio Editing: The Unsung Hero
Here's the truth most new editors don't want to hear: audio matters more than picture quality. Viewers will tolerate shaky camera work, less-than-perfect lighting, and amateur editing way longer than they'll put up with bad audio. Poor sound quality doesn't just distract from your message — it actively works against everything else you're trying to accomplish. I've seen beautifully shot videos crater in the comments simply because the audio was echoey or inconsistent.
Audiences can tolerate slightly lower-quality video — sometimes it's almost unnoticeable — but bad audio is an absolute dealbreaker. If dialogue is unclear, background noise is overpowering, or the sound levels are inconsistent, viewers will quickly lose interest. During editing, prioritize balancing your dialogue levels, reducing background noise using your software's built-in tools, and layering in background music at a volume that supports rather than competes with your voice. Ensure audio leveling so that your music, dialogue, and sound effects don't overpower one another. And don't underestimate the power of silence — a deliberate pause before a key point lands with far more impact than constant noise filling every second.
*
Elevating Your Edit: Beyond the Basics
Color Correction and Color Grading
Once your cut is locked and your audio is solid, it's time to address color — and this is where many beginners confuse two very different processes. Color correction is a technical process used to enhance or normalize the colors in a video image. The goal is to ensure that the colors accurately represent the real-world scene by adjusting brightness, contrast, and color balance. Color grading, on the other hand, is the creative layer that comes after. Color grading applies specific tones, styles, and moods to evoke emotions or achieve a particular atmosphere.
The order matters enormously. You always do color correction before color grading. This order matters way more than most beginners think. Trying to grade uncorrected footage creates endless headaches and weird results. Think of it this way: correction is fixing the foundation, and grading is painting the walls. Start by adjusting your white balance, exposure, and contrast to make the footage look natural and consistent across all clips. Then, if you want to apply a cinematic look, that's where LUTs (Look Up Tables) come in. Many different sources — camera companies, editing software companies, and many others — offer pre-made LUTs with all kinds of different looks, many based on popular movies and TV shows. You can download LUTs or LUT packs — some free, some paid — and apply them to your own work.
Graphics, Text, and Branding
Lower thirds, title cards, and end screens aren't just decorative — they communicate context and professionalism. A well-placed lower third that introduces a speaker immediately elevates the production value of any video. When designing text elements, choose fonts that are legible on mobile screens (where most content is consumed) and keep your color palette consistent with your brand. The end of your video is a prime opportunity to drive viewer interaction and keep them on your channel. A well-edited end screen can direct viewers to your next video, encourage them to subscribe, or click on external links.
B-Roll: The Art of the Cutaway
B-roll is supplementary footage that plays while your primary audio — an interview, a voiceover, or a narration — continues in the background. It's one of the most powerful tools in any editor's toolkit, and it's chronically underused by beginners. Adding slow-motion B-roll emphasizes dramatic or important moments. B-roll also helps you cover up jump cuts, making the video feel more polished and professional. If you're talking about the process of making coffee, cut to a shot of the beans being ground. If you're describing a city at sunset, show it. B-roll adds texture, context, and visual variety that keeps viewers genuinely engaged.
*
The Finishing Line: Exporting and Feedback
Reviewing Your Work with Fresh Eyes
Before you export anything, step away. Seriously. Sometimes when you're in the nitty-gritty of editing a video, you lose sight of how you wanted the video to look in the first place. Taking even a few hours away from a project and returning to it fresh reveals problems you were completely blind to — pacing issues, audio inconsistencies, awkward transitions. I make it a rule to never export on the same day I finish editing. Watch your video on different devices, too — your laptop, your phone, your TV if possible — because issues in color or audio often only reveal themselves on certain screens.
Getting and Using Feedback
Finding one or two people whose creative judgment you trust and asking them to watch your edit before you publish is one of the highest-leverage habits you can build. The key is asking for specific feedback rather than a general impression. Ask things like, "Did you feel the pacing dragged anywhere?" or "Was the audio balanced throughout?" Test different video formats and editing styles to see what works best with your audience. Pay attention to comments, likes, and shares to understand what your audience values. Monitor your analytics to track the effectiveness of your strategies.
Export Settings: Getting the Tech Right
All that work shouldn't be undermined by a bad export. Creating good videos is only part of the battle. To make sure your content appears its best on popular platforms such as YouTube, Instagram, TikTok, and others, you must export every one of your videos with the correct settings. For most platforms, the go-to format is MP4 with an H.264 codec — it balances file size and quality beautifully. Set your format to H.264, frame size to 1920 x 1080 for Full HD, and match the frame rate to your source video. For vertical platforms like Instagram Reels and TikTok, switch your resolution to 1080 x 1920. Upload higher-quality videos than required — YouTube compresses all uploads, so giving it a higher bitrate ensures cleaner playback.
*
Conclusion: Your Journey from Rough Cut to Reel Deal
Looking back across everything covered here, the throughline is simple: great video editing is not about expensive software, flashy effects, or the fanciest gear. Good editing is not about expensive gear or fancy effects. It's about telling a clear story, keeping things organized, and paying attention to details. From choosing the right software and building a clean file structure, to mastering audio balance, understanding color correction versus grading, and exporting for your specific platform — each of these steps compounds. Skip one, and the cracks show. Get them all right, and the results speak for themselves.
The most important thing I can tell you is this: every editor you admire started exactly where you are right now. The road to becoming an editing aficionado can take some time. As a beginner, the very best thing you can do is practice! A great way to do this is by recording footage to experiment with. The only way to get better is to do something regularly. You will learn something new about the process with every edit you make. Each project will sharpen your eye, your ear, and your instincts in ways no guide can fully replicate. So here's my challenge to you: Ready to transform your raw footage into captivating stories? Start applying these tips today! Share your first edited video in the comments below, or tell us which tip helped you the most. Let's create something amazing together!